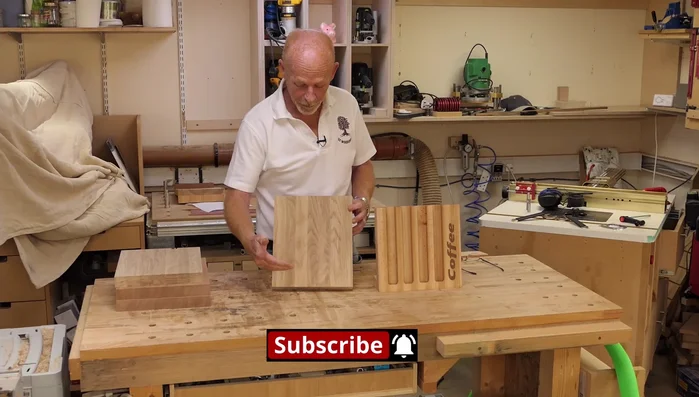
Are you a Nespresso aficionado tired of cluttered countertops and overflowing drawers? Do you yearn for a sleek, custom solution to store your coffee pods? Then this DIY Nespresso pod holder project is perfect for you! We'll guide you through creating a stylish and functional storage solution using readily available materials and a surprisingly simple technique leveraging your router table. This project is perfect for intermediate DIYers, requiring minimal woodworking experience and readily accessible tools. You'll be amazed at how quickly you can transform a few pieces of wood into an elegant organizer.
Forget overpriced, mass-produced organizers; this project allows you to personalize your pod storage to match your existing kitchen decor. We'll show you how to utilize basic joinery and a router table to achieve precise cuts and a professional finish. Ready to get started? Let's dive into the step-by-step instructions to build your very own customized Nespresso pod holder.
Preparation and Safety Guidelines
- Router table
- Half inch twin flute bit (spiral upcut bit recommended)
- Slot cutter bit
- Push block
- Sandpaper (180 grit)
- Chisel
- MDF for clamping
- Clamps
- Round over bits (9mm and 3.2mm)
- Mineral oil
- Glue (Tightbond II)
- Cotton cloth
- Always wear safety glasses when using power tools like a router. Wood chips and debris can cause serious eye injuries.
- Ensure the workpiece is securely clamped to the router table to prevent kickback or movement during routing. A poorly secured piece can cause injury.
- Use a push stick or similar tool to feed the wood into the router, keeping your fingers well clear of the cutter. Never reach over the router bit.
Step-by-Step Instructions
Prepare the Wood Blank
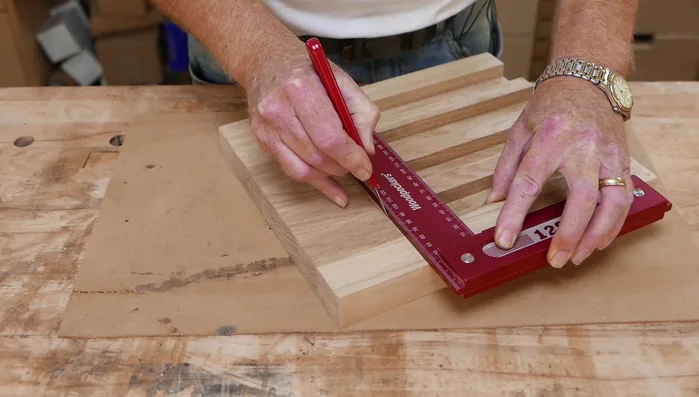
- Cut the wood blank to size (300mm x 260mm x 30mm) and sand to 180 grit.

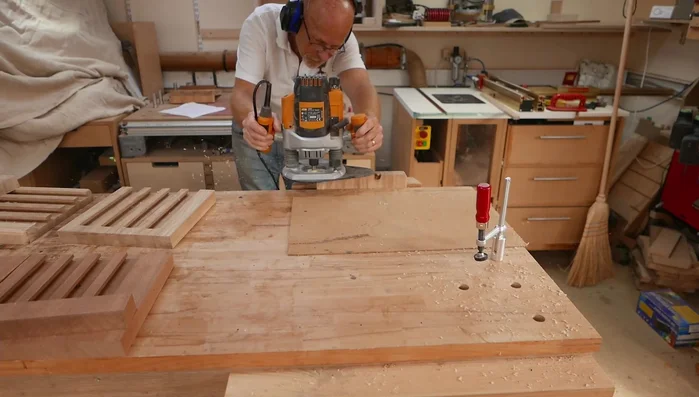
Prepare the Wood Blank Cut Main Pod Slots
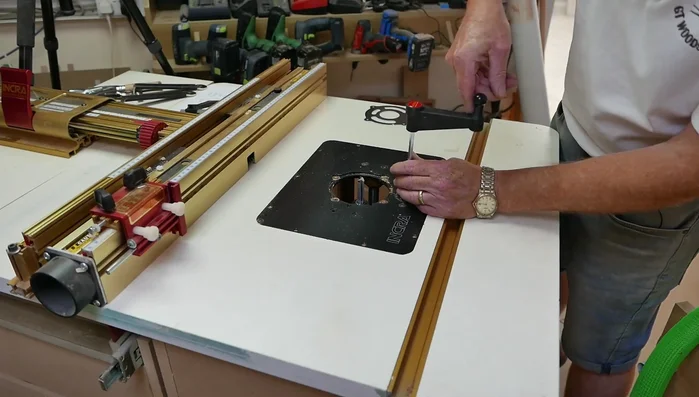
- Install a half-inch twin flute bit (or spiral upcut bit) set at 5mm height. Make three passes (5mm, 10mm, 15mm) to create the slots for the coffee pods. Use a fence and end stop for precise cuts. Ensure the fence is centered and the position marked at 80mm.
Cut Main Pod Slots Clean Up Edges
- Use a chisel to remove the excess material created during the main slot cuts. This creates a shoulder for the next steps.
Clean Up Edges Cut Lip Slots
- Change to the slot cutter bit. Adjust the height precisely to avoid leaving a shoulder. Perform climb cuts, ensuring a secure grip on the workpiece to prevent kickback. Reduce router speed for wider cuts.
Cut Lip Slots Cut the Angle
- Set the blade angle to approximately 10 degrees and cut the bottom 50mm off each piece. Note the blade tilt direction for correct slot orientation.
Cut the Angle Round Over Edges
- Use a 9mm radius round over bit on the back support piece and sides and top of the stand. Then use a 3.2 mm round-over bit on the slots to prevent breakout when rounding over the top edge.
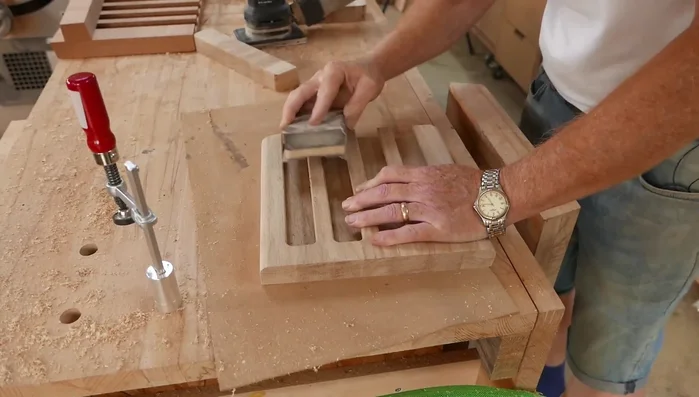
Round Over Edges Sanding
- Sand the entire piece thoroughly with 180-grit sandpaper.
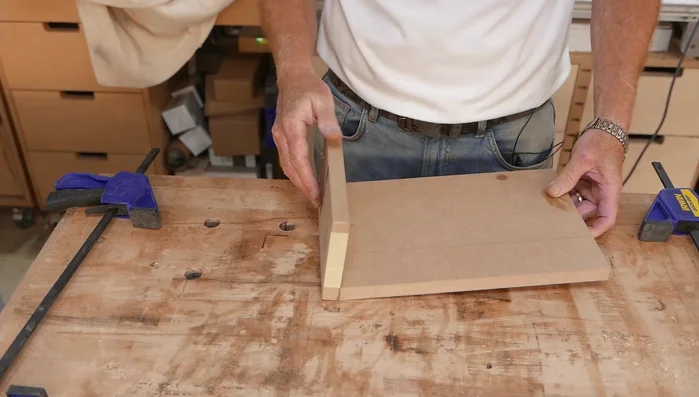
Sanding Glue and Clamp
- Apply glue to the support piece and clamp it to the main piece using an angled MDF jig.
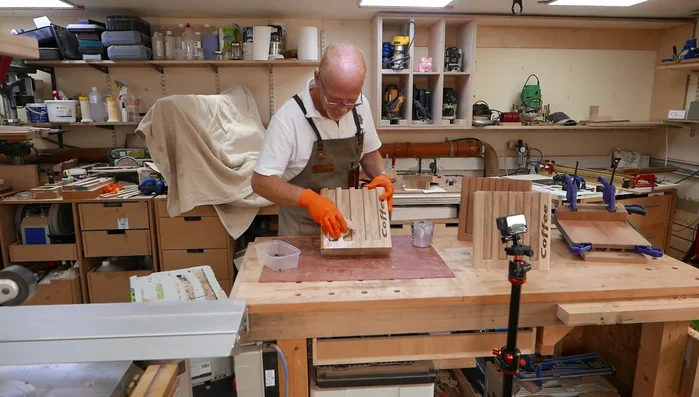
Glue and Clamp Apply Finish
- Apply mineral oil to bring out the grain and allow it to penetrate the wood thoroughly.
Apply Finish

Read more: Fix KitchenAid Espresso Machine Water Leak: The Steam Cap Solution
Tips
- Use a spiral upcut bit for cleaner edges when cutting the main slots.
- Employ a good push block, especially for climb cuts, to maintain control and safety.
- Precisely set the slot cutter bit height to prevent shoulders.
- Reduce router speed for wider cuts and climb cuts to minimize kickback.