The KitchenAid espresso machine, a popular choice for home baristas, can sometimes spring a frustrating leak, often stemming from the steam cap. This seemingly small component plays a crucial role in maintaining the machine's pressure and preventing unwanted water escape. A leaky steam cap not only creates a messy countertop but can also hinder the machine's performance and even cause damage over time. This is especially disheartening when you're eager for that perfect morning espresso. Ignoring a leak won't make it disappear; in fact, it's likely to worsen.
Dealing with a KitchenAid espresso machine water leak can seem daunting, but often a simple fix is within reach. In this article, we'll focus specifically on addressing leaks originating from the steam cap, guiding you through the process of identifying the problem and implementing an effective solution. For a detailed, step-by-step guide to repairing your leaky steam cap and getting back to enjoying delicious espresso, read on!
Preparation and Safety Guidelines
- KitchenAid Espresso Machine
- Nespresso Steam Cap (compatible)
- Sponge
- Toothbrush
- Kitchen Towel
- Always unplug the KitchenAid espresso machine from the power outlet before attempting any repairs or cleaning.
- Allow the machine to cool completely before handling any hot components, including the steam cap and surrounding areas. Burns are a serious risk.
- If you are unsure about any step of the repair process, consult the official KitchenAid repair guide or contact their customer service for assistance. Improper repairs may void the warranty or cause further damage.
Step-by-Step Instructions
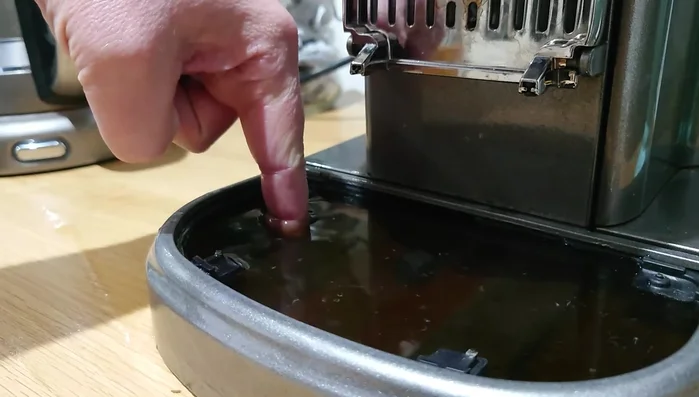
Diagnose the Leak
- Identify the leak. This fix is specifically for leaks from behind the coffee pod release chamber when a pod is inside.

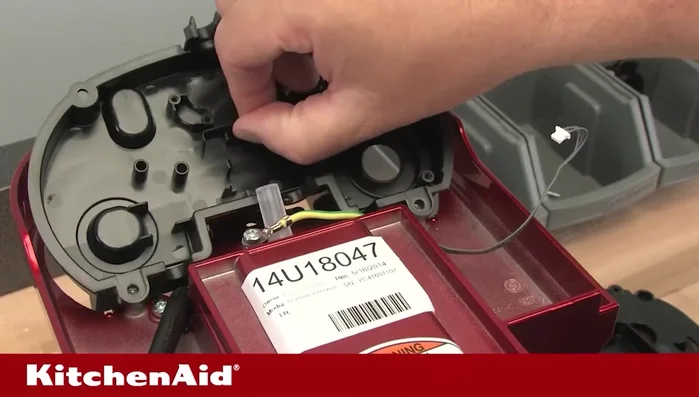
Diagnose the Leak Access the Steam Cap
- Locate and access the steam cap (also called steam cover or nozzle). Use the online video guide (link in description) up to 8 minutes 46 seconds. No need to remove the front button, sides, or cut any clips.
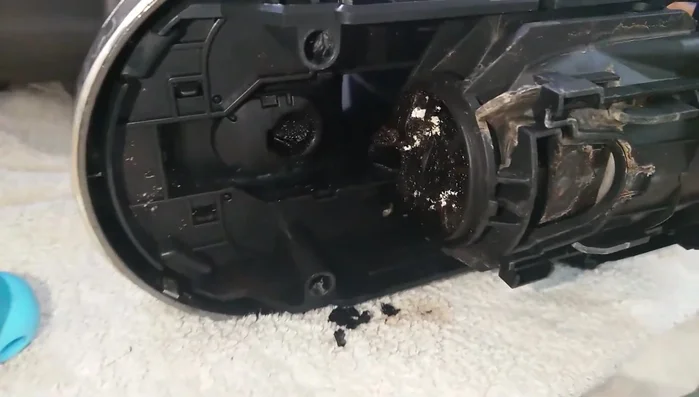
Access the Steam Cap Remove and Inspect the Old Steam Cap
- Remove the old steam cap. It may be loose or broken.
Remove and Inspect the Old Steam Cap Clean the Area
- Clean the area where the steam cap was attached. Remove old coffee grounds and residue using a sponge and/or toothbrush.
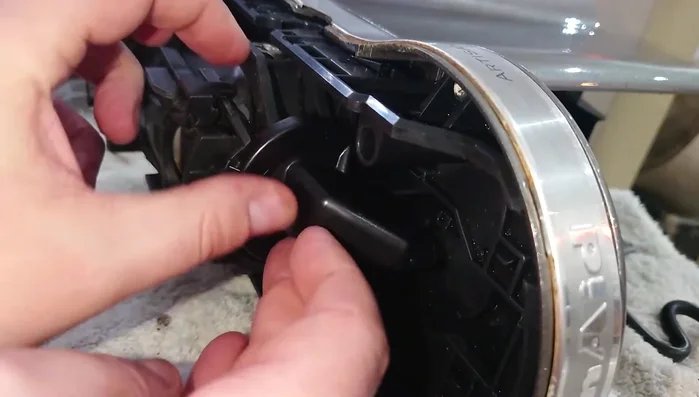
Install the New Steam Cap
- Install the new Nespresso compatible steam cap. Attach the bottom clip first, then snap the top clip into place.
Install the New Steam Cap Reassemble the Machine
- Reassemble the machine following the online video guide.
Reassemble the Machine

Read more: Effortless Under-Cabinet Coffee Pod Organizer Installation
Tips
- Check for other potential issues before attempting this repair, such as descaling the machine or using genuine Nespresso pods.
- Use appropriately sized aluminum Nespresso pods for a better fit and to prevent leaks. Avoid using compatible plastic pods.