Are you tired of overflowing craft supplies cluttering your workspace? Do you have a worn-out bread box gathering dust in your pantry? Then get ready to transform that seemingly useless item into a beautiful and functional storage solution! This upcycled bread box craft storage project is the perfect way to organize your creative chaos while embracing a sustainable approach to crafting. It's a surprisingly simple project that yields impressive results, breathing new life into an old container and keeping your crafting materials neatly contained.
Forget expensive craft storage solutions; with a little creativity and some readily available materials, you can create a charming and personalized storage box in no time. This tutorial will guide you through the easy step-by-step process, transforming your old bread box into a stylish and practical addition to your craft space. Let's get started!
Preparation and Safety Guidelines
- Bread box
- Spray paint (black and white)
- Screwdriver
- Silhouette Cameo/Cricut machine
- Vinyl (teal and green)
- Fine sanding block
- Transfer paper
- Clear contact paper
- Always ensure the bread box is thoroughly cleaned and dried before starting the craft project to prevent mold or mildew growth.
- If using paints or stains, work in a well-ventilated area and wear appropriate safety gear like gloves and a mask to protect yourself from fumes and potential allergens.
- If repurposing electrical components (e.g., adding lights), ensure all wiring is properly insulated and handled by someone familiar with electrical work to avoid fire hazards.
Step-by-Step Instructions
Prepare the Bread Box
- Clean the bread box. Remove any loose dirt or debris.

Prepare the Bread Box Paint the Bread Box
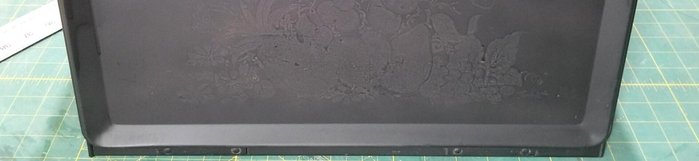
- Spray paint the entire bread box black. Allow to dry completely and apply a second coat.
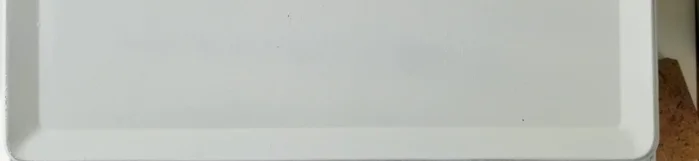
- Spray paint the entire bread box white. Allow to dry completely and apply a second coat.
Paint the Bread Box Distress the Paint
- Lightly distress the paint using a fine sanding block. Focus on edges and corners for a subtle, aged look.
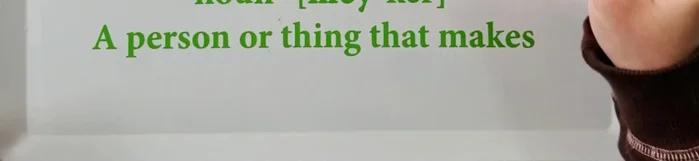
Distress the Paint Apply Vinyl Design
- Design and cut your vinyl design (in this case, the definition of 'maker').
- Carefully center and adhere the vinyl design to the front of the bread box using transfer paper.
Apply Vinyl Design Finish and Detail
- Reattach the handle after painting it (optional).
- Paint the inside shelves white and cover with clear contact paper to protect the paint.
Finish and Detail


Read more: DIY Wooden Bread Box: Simple Plywood Project
Tips
- Use a ruler to ensure your vinyl design is straight, especially for long designs.
- Transfer paper makes applying vinyl designs much easier, especially for longer words or phrases.
- Don't over-sand the paint, you just want to reveal a little bit of the black layer for a distressed look.