Royal vending machines, known for their reliability and sophisticated features, can sometimes require adjustments to ensure optimal performance. From minor tweaks to address dispensing issues to more complex calibrations for improved efficiency, understanding the inner workings of these machines is crucial for maximizing their potential and minimizing downtime. Whether you're a seasoned vending machine technician or a business owner responsible for maintaining your own equipment, mastering these adjustments can significantly impact your bottom line and overall satisfaction.
This guide provides a comprehensive, step-by-step approach to tackling a range of common adjustments for Royal vending machines, empowering you to troubleshoot and resolve problems effectively. We'll cover everything from simple coil adjustments to more advanced programming procedures, ensuring you have the knowledge and confidence to keep your machines running smoothly. Let's delve into the practical details and get started on mastering your Royal vending machine adjustments.
Preparation and Safety Guidelines
- Royal Vending Machine
- Magnetic light (optional)
- Lamp (optional)
- Always disconnect the power supply before performing any adjustments or repairs. Electricity can be lethal.
- Never reach into the dispensing mechanism while it's powered on. Moving parts can cause serious injury.
- If you are unsure about any adjustment, consult the machine's manual or seek professional assistance. Incorrect adjustments can damage the machine or cause malfunctions.
Step-by-Step Instructions
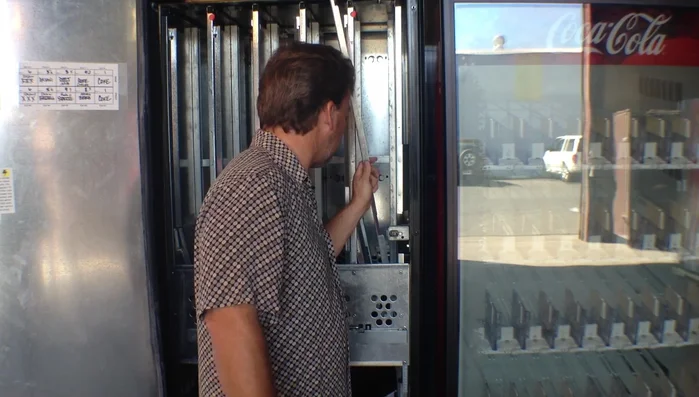
Locate Instructions
- Locate the adjustment instructions inside your Royal vending machine.
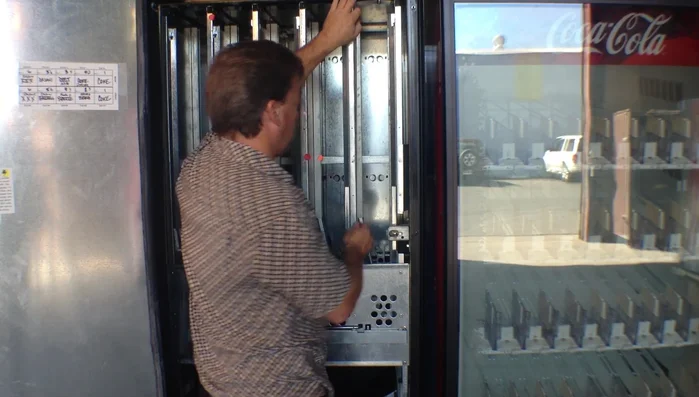
Adjust Front Spacers for Cans
- Adjust the column spacers for the correct package type (cans, bottles, etc.). For 12oz cans, set the spacers all the way to the outside. Insert the bottom spacer first into the slots, lift slightly to hook it, and then lower it completely. Repeat for the other side.

Adjust Front Spacers for Cans Determine Bottle Settings
- Consult your machine's menu to determine the correct settings for your specific bottle type (e.g., plastic contoured bottle).
Determine Bottle Settings Adjust Front Spacers for Bottles
- Using a lamp or magnetic light, count the number of slots indicated on the menu for the front retainer. Insert the bottom spacer first into the slots, lift slightly to hook, and lower it into position. Repeat for the other side.
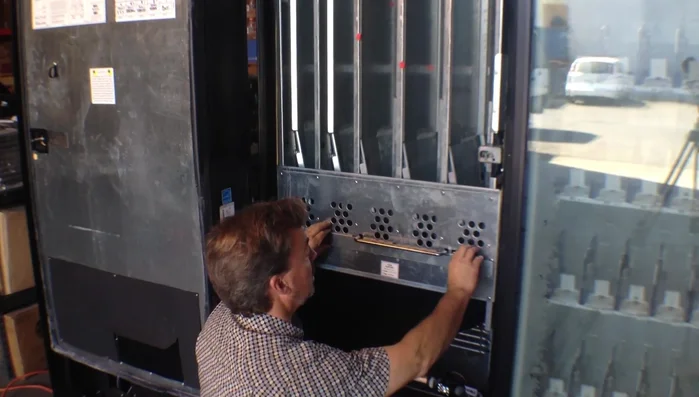
Adjust Rear Spacers
- Adjust the rear spacers according to the menu instructions (e.g., third notch for 20oz contoured bottles). Squeeze the release mechanisms to adjust these.
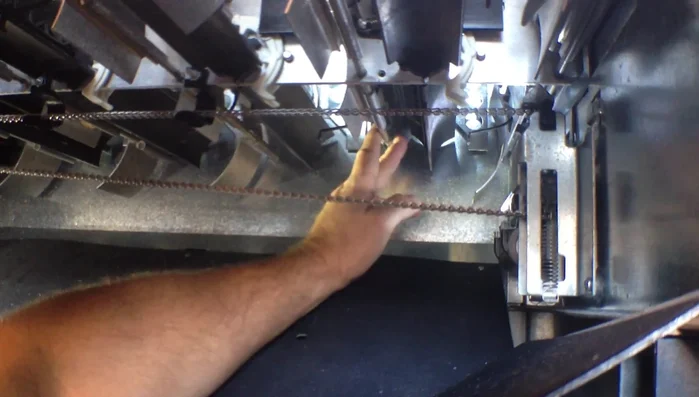
Adjust Rear Spacers Adjust Width
- Adjust the width by pulling out the width adjustment rods (two for the front columns and two for the rear columns). Be careful to grab the correct rods to avoid damaging the mechanism.
- Carefully pull the rods to adjust the width to accommodate your package type. For cans, the rods go in the bottom position; for bottles, the top position. Reinsert the rods and double-check your adjustment.
Adjust Width

Read more: DIY Rotating Canned Food Storage Unit: Maximize Space & Organize Your Pantry!
Tips
- Use a lamp or magnetic light to easily see the adjustment slots and rods.
- Always insert the bottom spacer first when adjusting the front and rear spacers.
- Be extremely careful when adjusting the width rods to avoid pulling out incorrect components and damaging the mechanism.