Are you tired of rushing home to feed your furry friend, or worried about ensuring consistent mealtimes while you're away? A perpetually full food bowl might seem like the solution, but it often leads to overeating and wasted food. The answer? A DIY automatic dog food dispenser! Building your own automatic feeder offers a fantastic alternative to expensive store-bought models, allowing you to customize the design and functionality to perfectly suit your dog's needs and your budget. Forget complicated engineering; this project utilizes readily available materials and simple mechanisms, making it achievable even for beginners.
This guide presents a budget-friendly and easy-to-make automatic dog food feeder, perfect for pet owners who value practicality and cost-effectiveness. We’ll walk you through each step, from gathering the necessary materials to the final assembly and testing, providing clear instructions and helpful tips along the way. Ready to get started on building your own pet-perfect, money-saving automatic feeder? Let's dive into the step-by-step process!
Preparation and Safety Guidelines
- Two 5-gallon buckets
- Lids (for buckets)
- Knife
- Scissors
- Sharpie (optional)
- Always supervise your pet during initial use of the feeder to ensure they understand how to access the food and to identify any potential issues.
- Use food-safe materials only. Avoid materials that could leach harmful chemicals into the food or be chewed and ingested by your pet.
- Regularly inspect the feeder for any damage or malfunctions. A broken feeder could lead to food spillage, malfunction, or even injury to your pet.
Step-by-Step Instructions
Prepare the Main Bucket
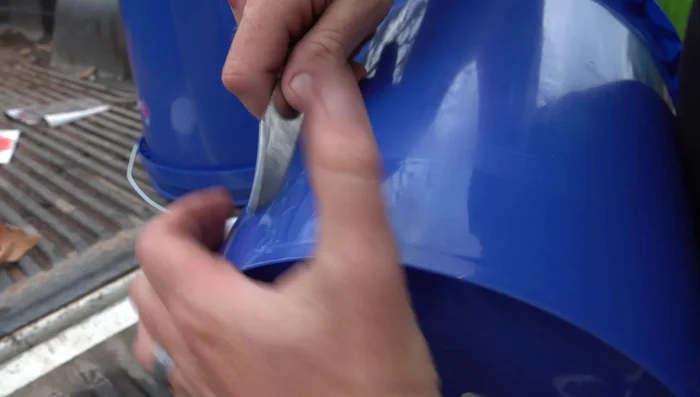
- Mark the desired size of the food dispensing hole on the bottom of one bucket using a Sharpie or scissors.
Cut the Dispensing Hole
- Carefully cut out the marked area, ensuring it's slightly smaller than initially planned to create a snug fit for the food dispenser.

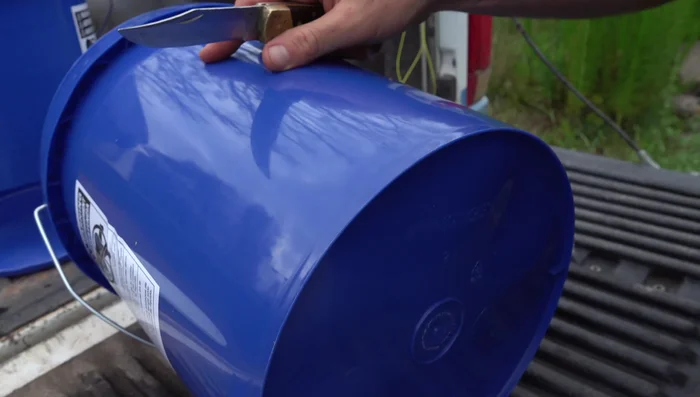
Cut the Dispensing Hole Prepare the Dispenser Bucket
- On the second bucket, mark a ring about the same height as the opening you made on the first bucket.
- Cut out the marked ring from the second bucket.
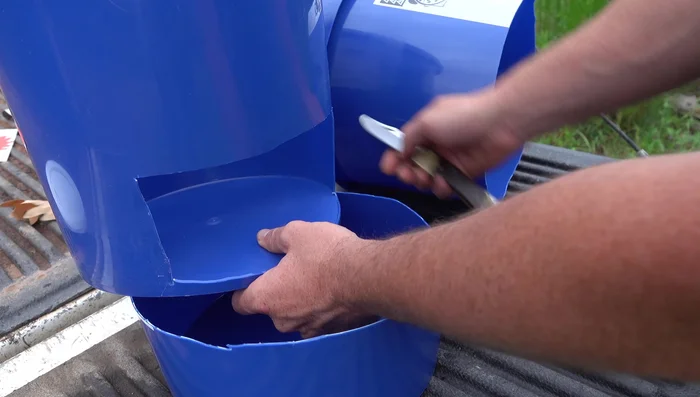
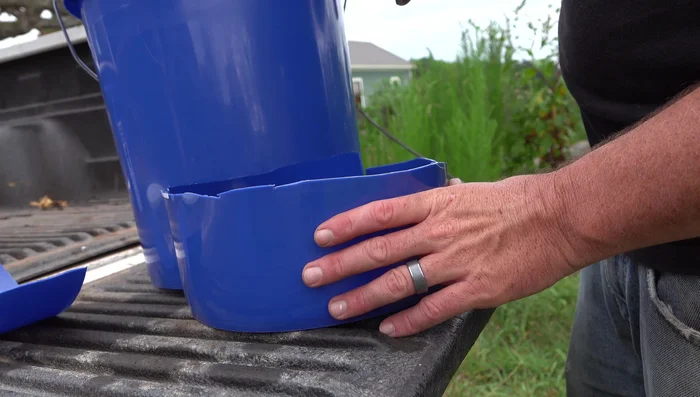
Prepare the Dispenser Bucket Shape the Dispenser
- Cut and shape the dispenser piece to match the opening on the main bucket. This should allow for smooth dispensing of food.
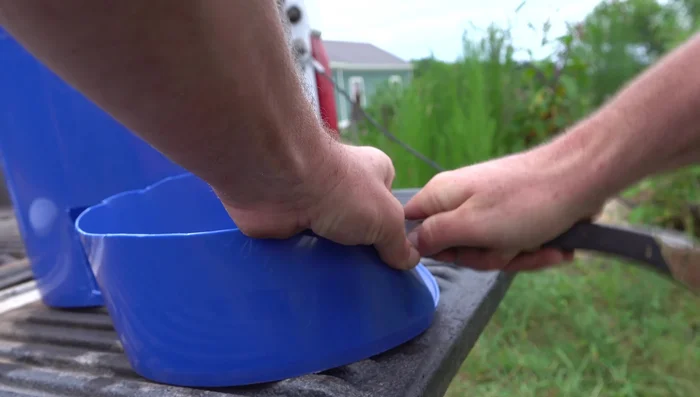
Shape the Dispenser Create Dispensing Slots
- Cut narrow slits on the sides of the food dispenser piece to allow the food to flow out.
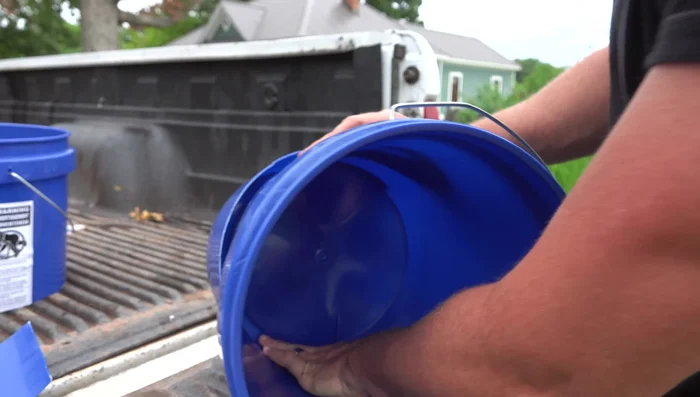
Create Dispensing Slots Assemble the Feeder
- Insert the dispenser piece into the main bucket's opening. It should fit snugly.
- Ensure the dispensing slots are positioned correctly and the dispenser is firmly placed to prevent clogging.
Assemble the Feeder Add the Lid
- Place a lid (from a suitable bucket) on top of the main bucket. This helps keep the food dry and prevents the pet from accessing the food directly.
Read more: Deep Clean Your Garbage Disposal with Ice and Bleach: A Pro Tip!
Tips
- Make the dispensing hole large enough for the dog food to flow freely, preventing jams.
- Cut the dispensing slots at an angle for improved food flow.
- Use the slits on the food dispenser to help funnel the food and prevent clogging.