This article details a simple and creative DIY project: building a smart food dispenser from readily available materials. Forget expensive, complicated store-bought options – this project empowers you to construct a functional dispenser using common household items like tissue boxes, plastic bottles, and basic crafting tools. The focus is on a manual, mechanical design, providing a solid foundation that can be easily upgraded with electronic components later. This hands-on project is ideal for those seeking a fun and rewarding DIY experience, promoting resourcefulness and reducing waste.The step-by-step guide walks you through the construction process, from preparing the base and creating the dispensing mechanism to testing and refining the final product. Clear instructions and safety precautions ensure a successful build, even for beginners. This project not only offers a practical solution for dispensing food but also serves as a springboard for further experimentation and customization. Whether you're looking to create a unique pet feeder, a clever kitchen gadget, or simply enjoy a fun crafting challenge, this DIY smart food dispenser project is the perfect place to start.
Pros And Cons
- Easy to make using readily available materials like tissue boxes, water bottles, and sticks.
- Simple design and functionality.
- Manual operation (requires hand-cranking); not truly 'smart' without added electronics and coding.
- Requires careful use of potentially dangerous tools (cutter) under adult supervision.
Read more: Smart Food Dispenser with Level Indicator: Top 5 Picks
Project Overview: Why Build a Smart Food Dispenser?
Building a smart food dispenser offers a practical solution for providing food in a convenient and efficient manner. This project focuses on a simple mechanical model, easily adaptable for future electronic upgrades. The design prioritizes resourcefulness, using readily available materials to minimize waste and expense. The final product aims to be a functional and potentially helpful device.
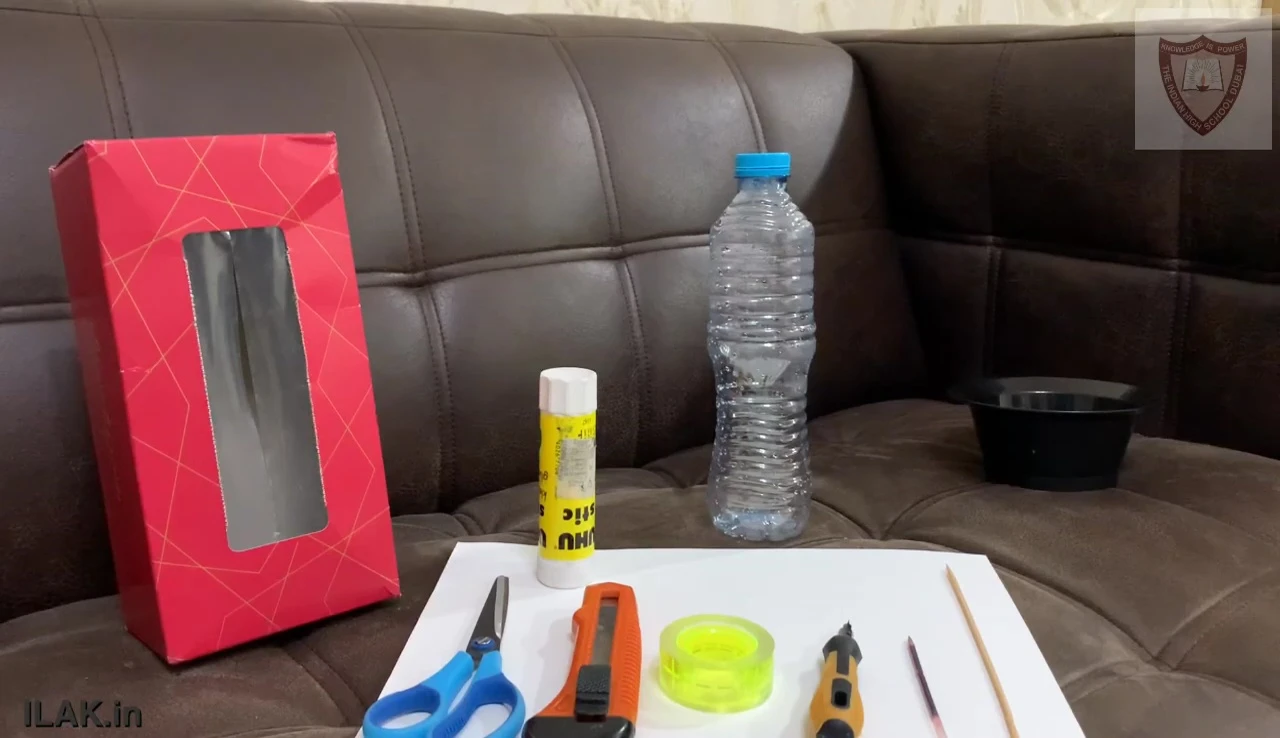
Materials and Tools: Gathering Your Supplies
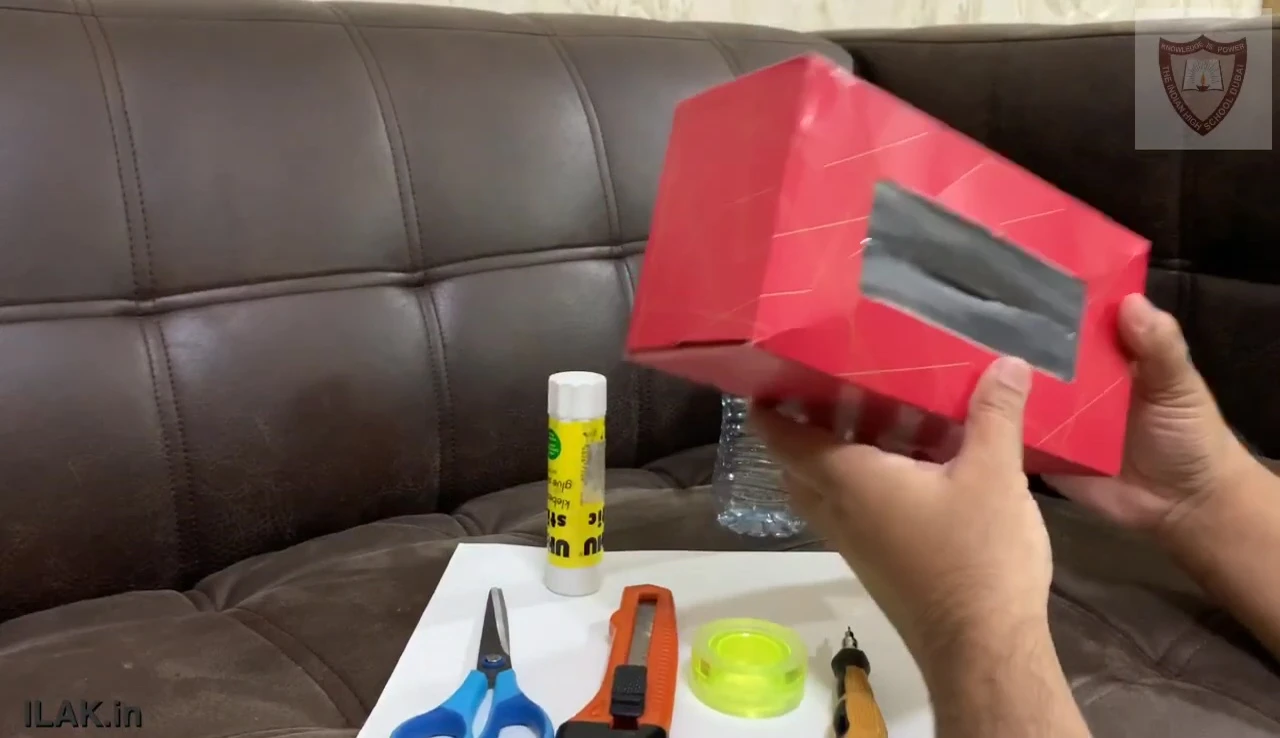
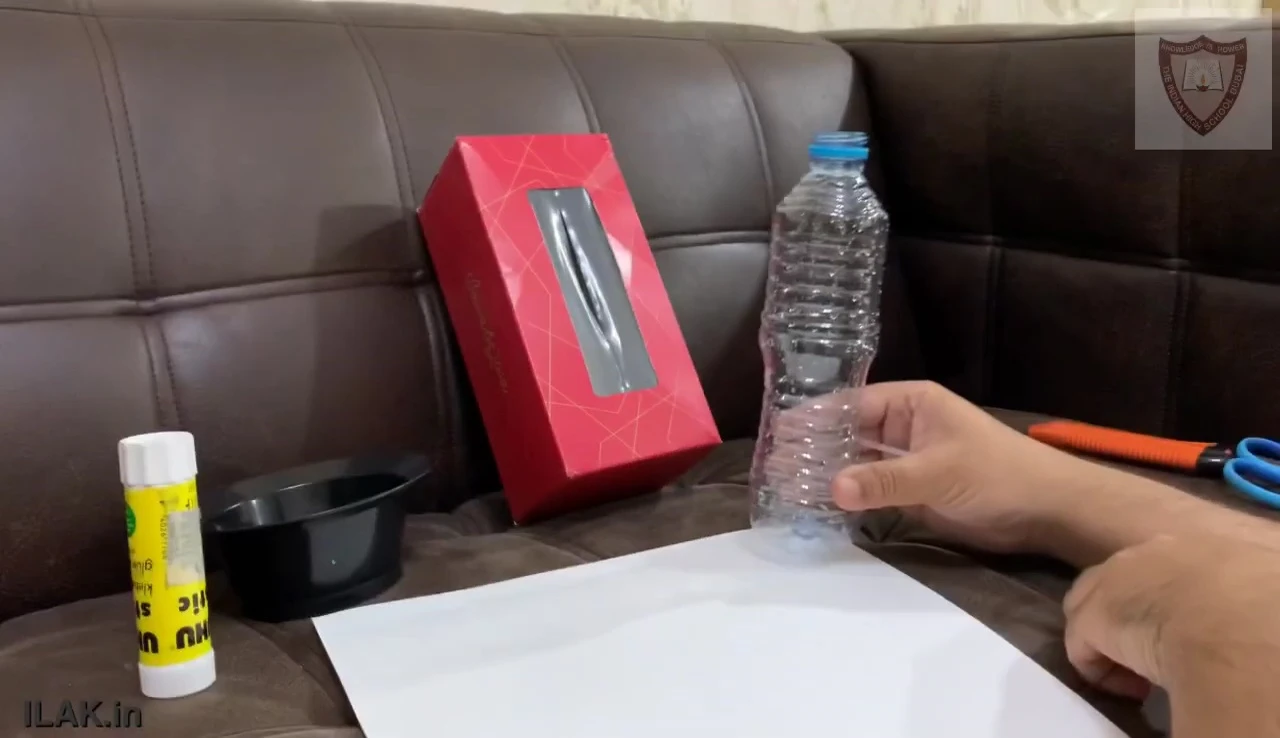
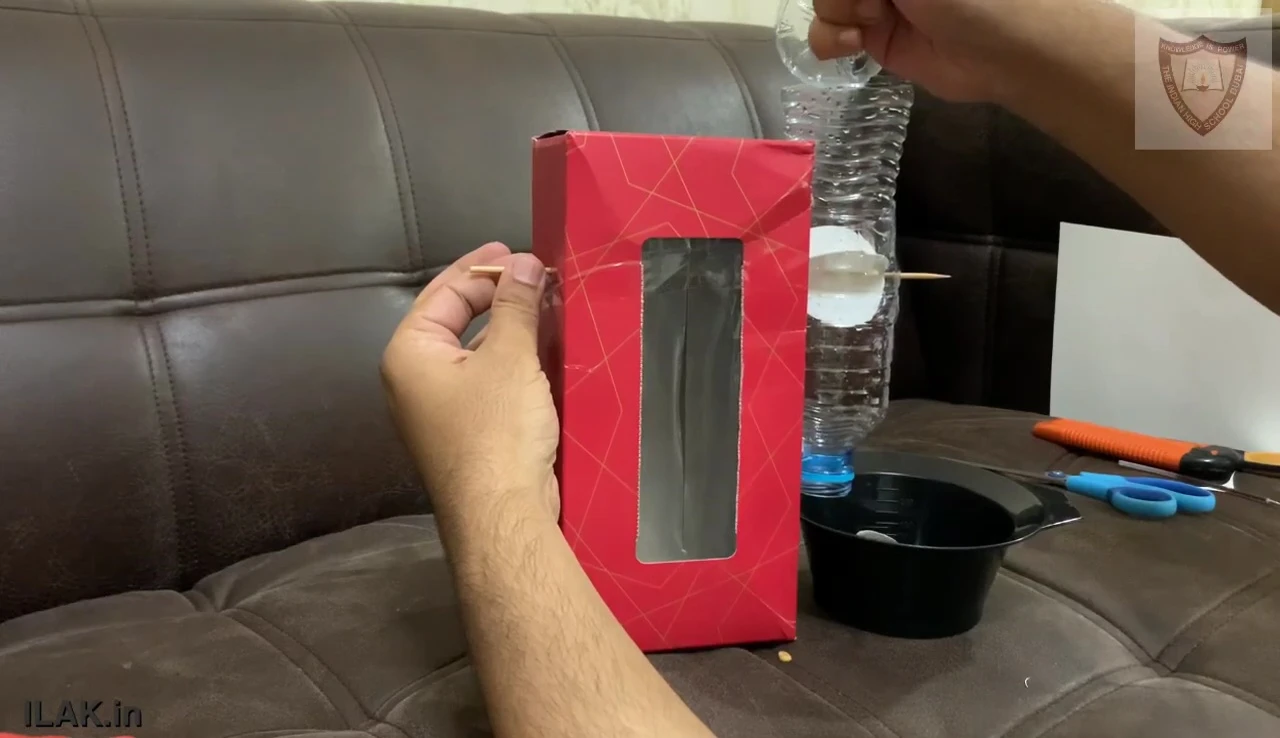
To build this dispenser, you'll need commonly found items. A tissue box or shoebox forms the base. A cylindrical container, such as a plastic bottle or pipe, acts as the food chute. A smaller container collects the dispensed food. Finally, you'll need tools like a cutter, glue, and possibly a lighter or heating tool for precise hole-making. Remember to always prioritize safety and work under adult supervision.
Carefully select the size of your materials. Ensure your chosen bottle fits comfortably within the box to create an effective dispensing mechanism. It's crucial to remember that sharp tools and potential heating elements require careful and supervised use.
Construction: Building the Dispenser Mechanism
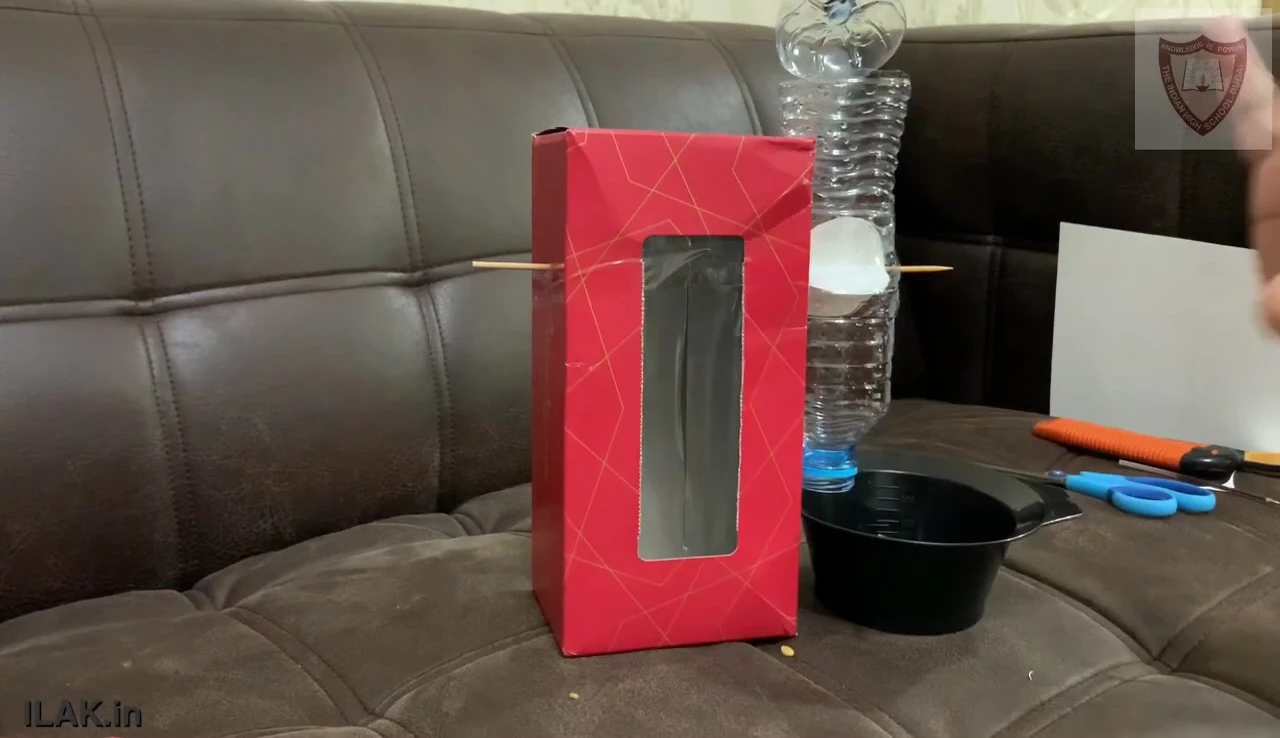
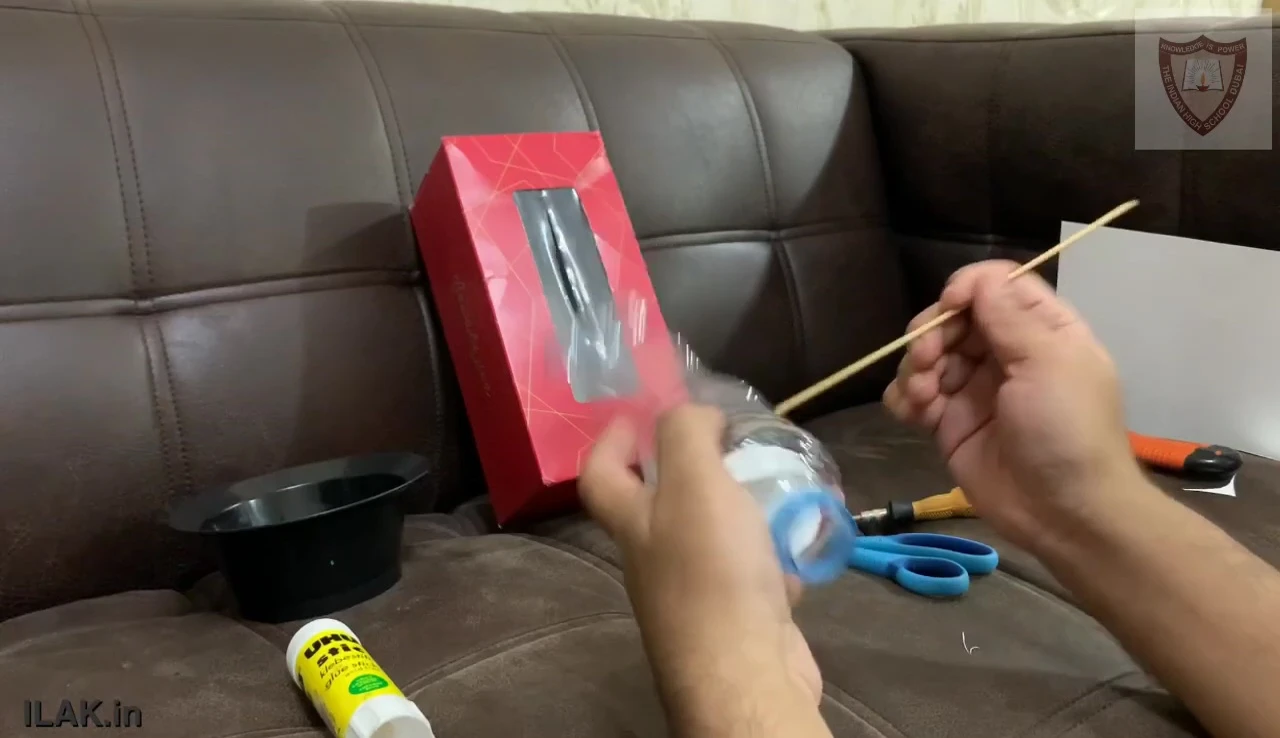
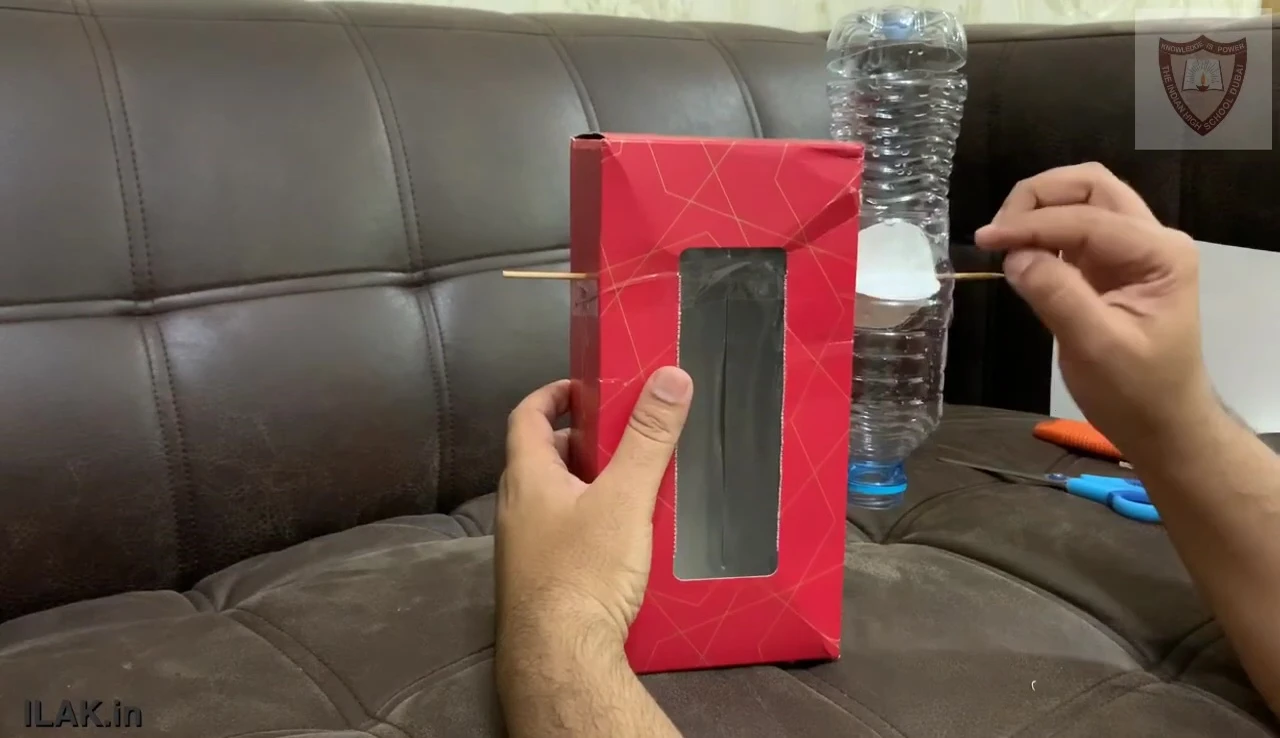
Begin by preparing your box. Cut a slot in the top to allow for food insertion. Create a rotating flap mechanism using cardboard cutouts. Fold each cutout in half and assemble them to form a durable and functional flap. The flap's rotation controls food dispensing. This will be attached to a central rod that passes through the food chute.
The precise measurements for the flap will depend on the size of your chosen bottle. Ensure the flap fits snugly within the chute to regulate the flow of food. Thorough construction and accurate sizing are key to the successful operation of the dispenser.
Assembling the Components: Connecting the Parts
Carefully create holes in the box and bottle to accommodate the central rod. This rod, attached to the flap, will serve as the dispensing mechanism. The food container is positioned at the bottom to collect the dispensed food. Securely affix the bottle to the box, ensuring the rod rotates freely.

Make sure the holes are precisely aligned to allow for smooth rotation of the flap and bottle. The strength and stability of the connections are paramount to preventing malfunction. Test the rotation of the flap to ensure optimal functionality.
Testing and Refinements: Optimizing Your Dispenser
Thoroughly test the dispenser by rotating the bottle to dispense food. Ensure the flap controls food flow effectively. If necessary, make adjustments to the flap or the size of the holes for better control. A successful test will demonstrate a well-functioning, manually-operated dispenser.
Ensure the food chute and collection container are thoroughly dry before testing to prevent malfunctions. Any adjustments should be made carefully to avoid compromising the structural integrity of the dispenser. Continued testing and fine-tuning will optimize its performance.
Conclusion: Potential for Expansion and Customization
This project provides a foundation for a smart food dispenser. By adding electronic components (a motor, a switch, and potentially some coding), the manual rotation can be automated. The addition of lighting or other features enhances the design. This basic model demonstrates the potential for a functional, creative, and personalized device. You are encouraged to personalize and enhance it to suit your creative vision.
The potential of this project lies in the adaptability and customization options. The simple mechanical design serves as a solid base for future upgrades. Feel free to enhance its design with aesthetics and advanced features as your skills and resources allow. This DIY project allows for great creative freedom