Get ready to unleash your inner artist with this fun fall baking project! This guide provides step-by-step instructions for decorating five charming pumpkin patch-themed cookies, perfect for adding a touch of autumnal delight to your baking repertoire. From whimsical pumpkin trucks to vibrant sunflowers and rustic "Hello Fall" messages, these cookie designs cater to various skill levels, ensuring a satisfying experience for both beginners and seasoned bakers. Each design utilizes unique techniques, showcasing various icing methods, stenciling, and even a wet-on-wet approach, allowing you to expand your cookie decorating expertise.Prepare to be inspired by the detailed instructions and stunning visuals that guide you through each cookie creation. Learn how to create perfect circles, utilize piping tips for precision, and master the art of layering icing for depth and texture. Whether you're aiming for intricate detail or a simpler, rustic charm, these five designs offer a diverse range of options to suit your style and skill level. Gather your baking supplies, put on your apron, and let's get decorating!
Pros And Cons
- Easy to make
- Uses stencil for design
- Easy to make
- Features wet-on-wet design
- Cute design
- Uses various icing colors for a muted fall palette
- Takes multiple steps to create
- Large icing area requires longer drying time
- Fun design
- Uses sprinkles
Read more: 5 Best Brabantia Cookie Jars: A Buyer's Guide
The Truck with Pumpkin Cookie
This charming cookie design features a whimsical truck carrying a pumpkin. Creating the wheels involves using a coupler to trace perfect circles with a food-safe marker as a guide. The 20-second icing is ideal for outlining and flooding these small areas, ensuring a clean finish.

Adding the bumpers requires a bit more precision, so using a piping tip helps achieve the desired shape. A scribe proves useful for repositioning icing as needed. Remember to let the base icing dry adequately before adding further details.

Once the base colors are set, details such as the truck's outline, pumpkin stem, vines, and tiny pumpkins on the wheels are added for that final touch. Using various icing tips allows for varying thicknesses and textures, adding depth to the design.

The Sunflower Cookie
This vibrant sunflower cookie is made using a simple circle template for the center. A brown center is flooded first, then generously covered in chocolate sprinkles. This step involves placing the cookie on a coffee filter to manage excess sprinkles.

After the sprinkles set, bright yellow icing and a tip number 67 are used to create the sunflower petals. The key is to use a stiff icing and apply a firm pressure followed by a gentle wiggle to form each petal.

Two rows of petals are piped to create a full and realistic sunflower look. Remember to let each layer of icing dry before adding the next for a crisp and dimensional effect.

The Stenciled "Hello Fall" Cookie
This design uses a mini buffalo plaid stencil to create a rustic fall feel. A light application of yellow airbrush color is added to the base cookie icing, before applying the stencil.

Next, a thick brown icing is applied over the stencil, carefully gliding it across the surface to create the text. Excess icing is scraped away, and the stencil removed to reveal the message.

The result is a charming, crisp "Hello Fall" message against a muted background. This technique shows how easy it is to add layers using stencils for impressive results.

Stacked Pumpkins Cookie
This cookie uses a wet-on-wet technique, layering different shades of orange icing to create dimension. After outlining, the top and bottom pumpkins are flooded with a sunset orange icing.

While the icing is still wet, pastel orange icing is piped on top, blending beautifully to create a textured surface. This technique simplifies the process and yields an appealing result.

Once dry, additional details like stems, vines, and leaves are added using different tips. This shows the simplicity of achieving a realistic pumpkin look with minimal steps.

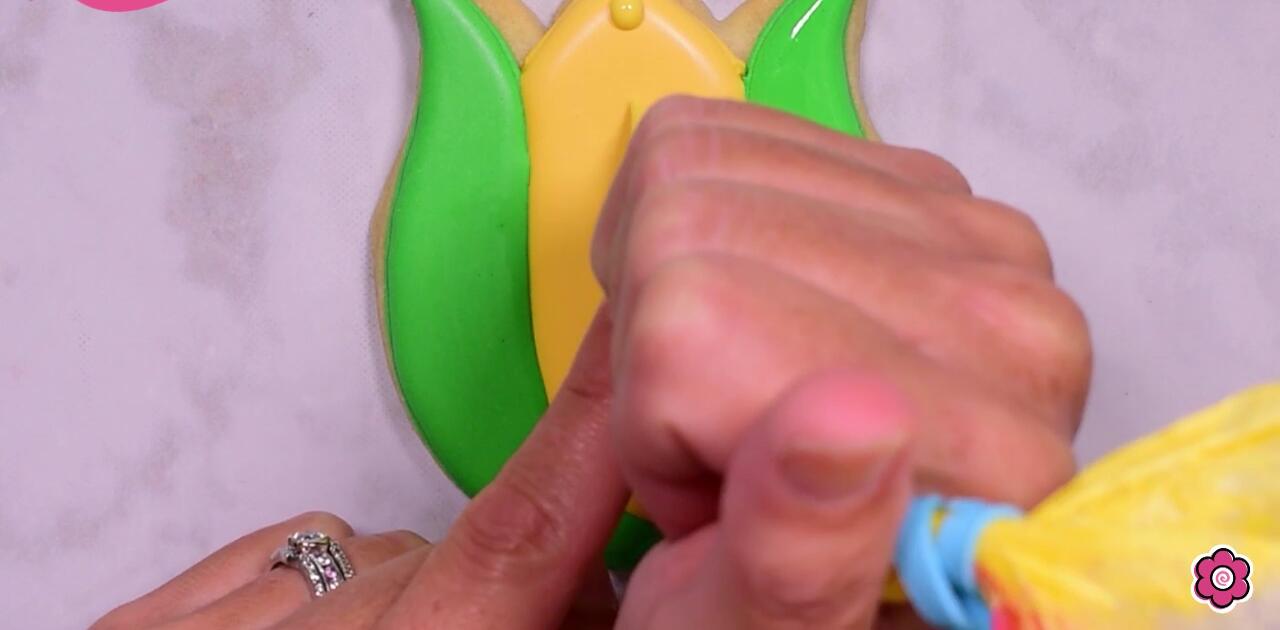
Tall Pumpkin and Corn Cob Cookies
The tall pumpkin is decorated using alternating shades of orange icing, creating a bumpy texture. Outlining each section before flooding allows for precise control and a more realistic pumpkin look.

The corn cob cookie starts with green icing to represent the husk, flooded first before adding the golden yellow corn cob background. Different shades of yellow, orange, brown, and red are used to create a realistic corn cob design.

Allowing each layer of icing to dry slightly before applying the next helps prevent blending and maintains the distinct shapes of the corn kernels. The results are charmingly realistic and festive.